 I’m a sucker for handprint crafts. I love that it captures your littles’ handprints at a moment in time that you’ll have forever – their hands won’t always be this small.
So when I was brainstorming Father’s Day gifts, handprints are always one of my go-tos. This year, I wanted something more utilitarian than a paper craft, especially since we already made a LEGO Star Wars photo frame for #DoneWithFun Daddy’s desk at work.
This post contains affiliate links. As an Amazon Associate, I earn from qualifying purchases. Read my full disclosure policy for all the boring details.
And then I remembered a favorite project from my childhood: Shrinky Dinks.
Yes, I’m a child of the ‘80s and ‘90s. I also loved my Lite Brite, My Little Pony (with normal eyes, not crazy-wide anime eyes), trolls with belly-button gems, Popples, Spirograph, and slap bracelets.
I know I’m aging myself, but do you remember how cool Shrinky Dinks were when you were a kid? You colored on special paper, popped them in the oven, and three minutes later, had a miniature version of your artwork. It literally seemed like magic.
I honestly wasn’t even sure Shrinky Dinks even existed any more, but I should have known Amazon wouldn’t let me down. Cue the same magic for my kids, and a simple, sentimental gift for Father’s Day.
Of course, putting your littles’ handprint onto a Shrinky Dink means it’s going to end up a lot smaller than your child’s actual hand … but it also gives you an end product that is meaningful while still small enough that your husband won’t cringe when he opens it and is obligated to use it.
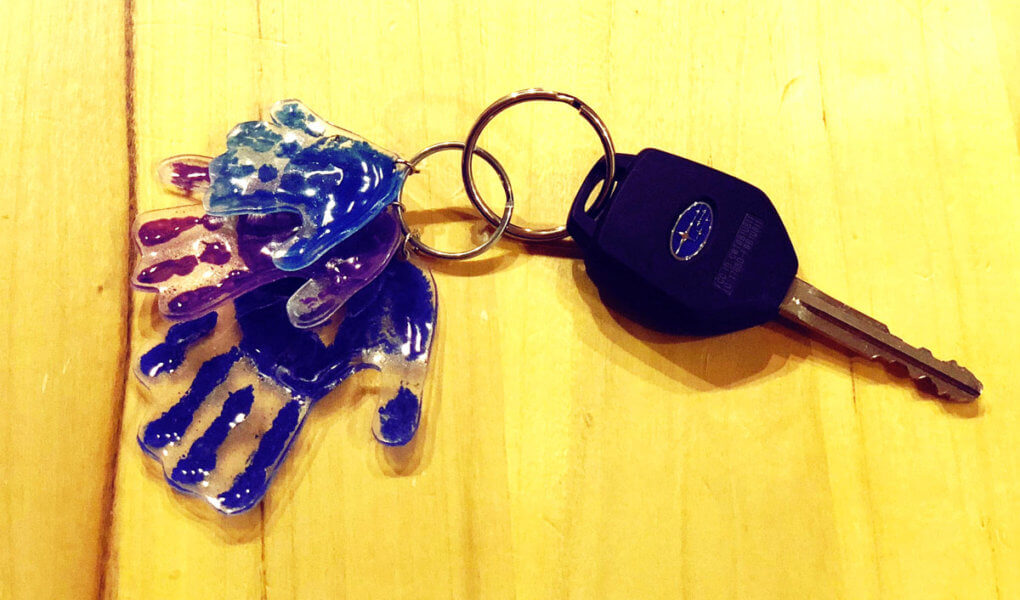
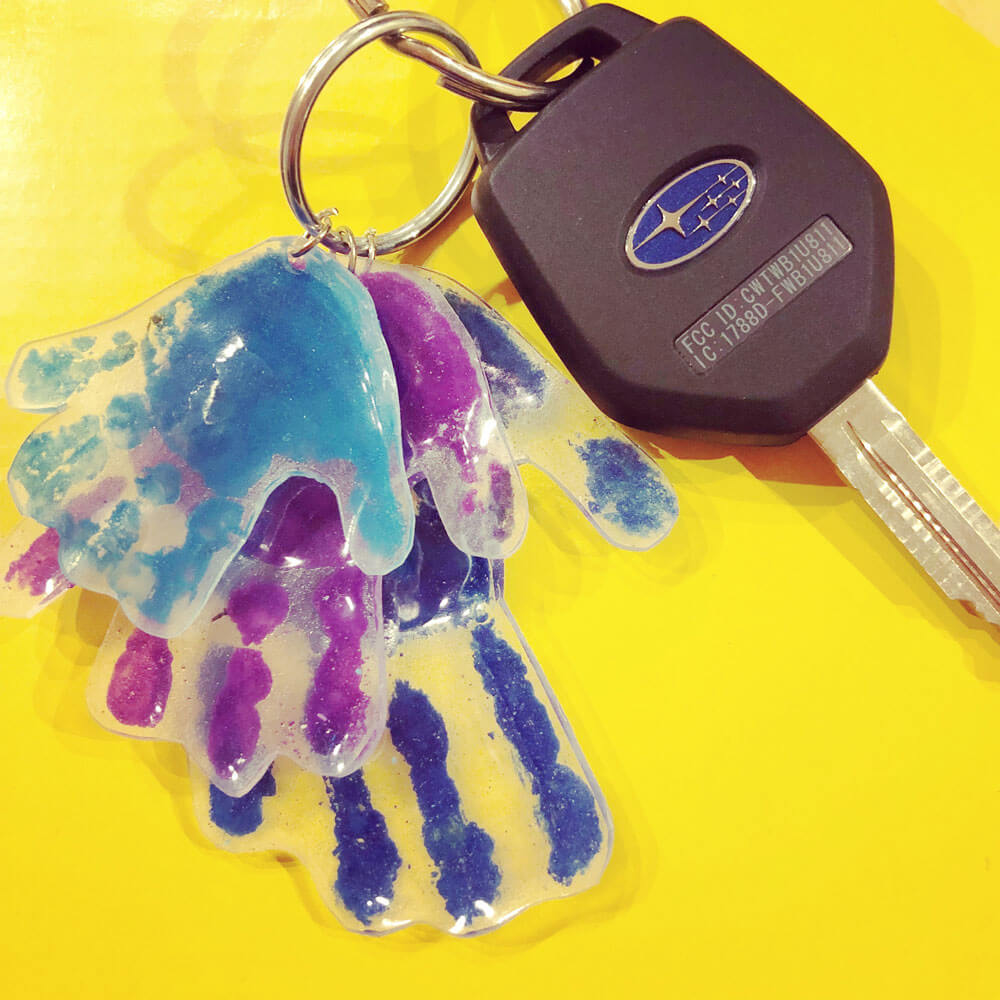
Symbolically, this keychain is a sweet way to keep your child’s hand in yours always – even when they grow up and inevitably shrug you off when you try to hold their hand in public. (And it will happen. And it will sting a little.)
The boys and I made this quick project for Father’s Day, but it’s also a great gift for grandparents and other relatives. I don’t kid myself that there are a lot of dads out there scrolling Pinterest for easy DIY Mother’s Day gifts, but if you are one of them, I promise you this project is easy enough that any dad could accomplish it too.
Father’s Day Shrinky Dink Handprint Keychain
Supplies
- Shrinky Dink paper
- Washable tempera paint
- Any kind of markers
- Scissors
- Hole punch
- Mod Podge waterbase sealer or Mod Podge Clear Acrylic Sealer spray
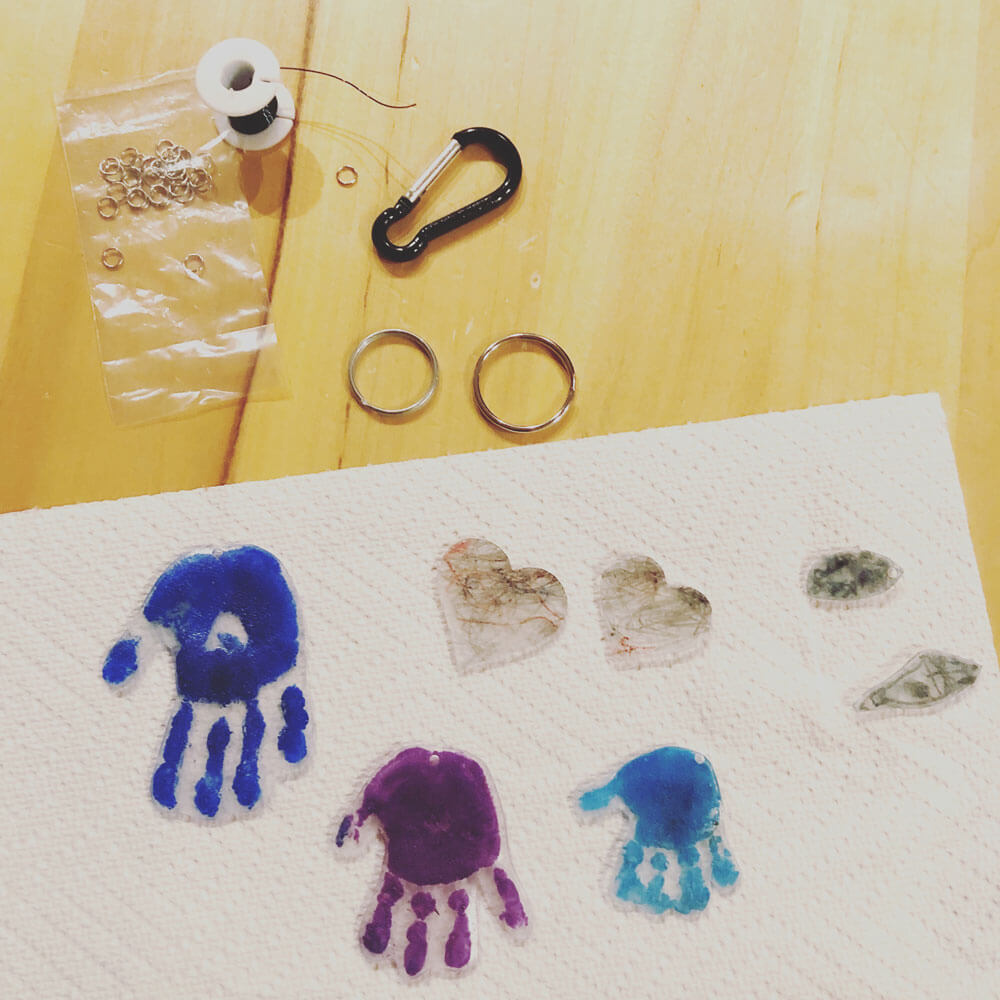
- 4 mm jump rings
- Key chain
How To
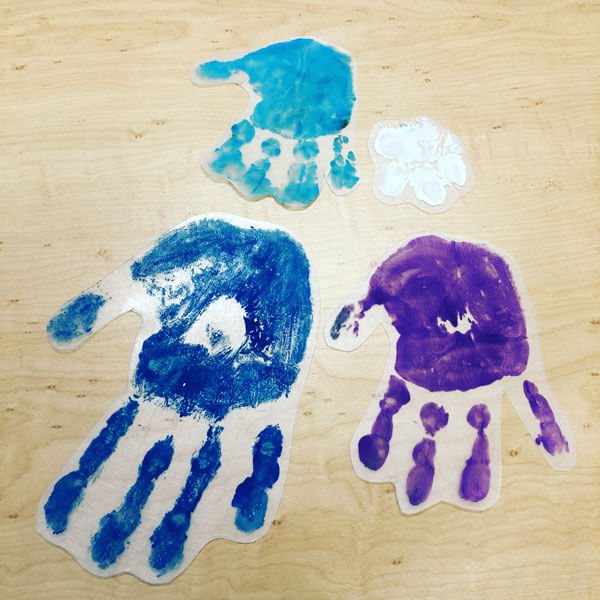
- Use washable tempera paint to paint the palm and fingers of your child’s hand and help them stamp it onto the Shrinky Dink paper (rough side, not smooth side) to make a handprint. Let dry.
- Once dry, cut around handprint and punch hole at the top (I chose to punch the hole in the “palm” side.)
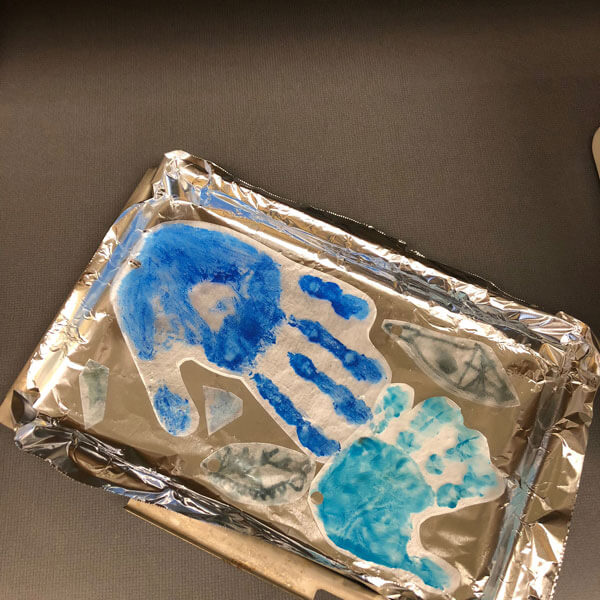
- Follow instructions to bake Shrinky Dinks, on foil or parchment paper.
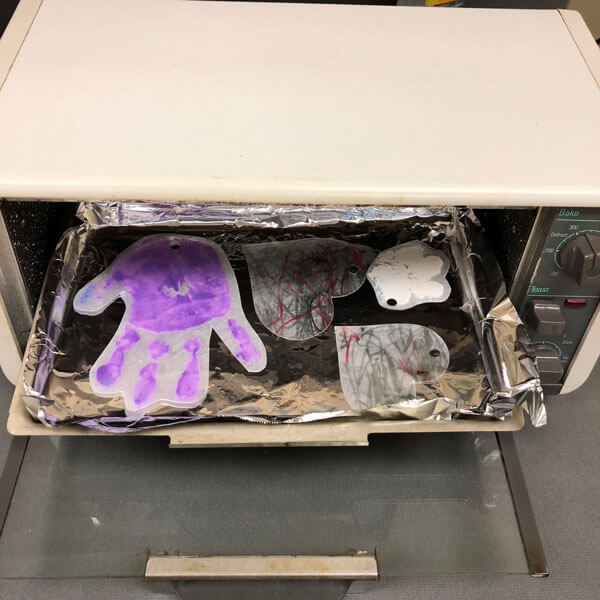
- When baking, the handprints will start to curl up. Don’t panic when they start to curl. Let bake for 1 more minute and they will start to flatten out again.
- As they begin to flatten, carefully remove the tray from the oven and use an oven mitt to gently flatten the handprints all the way.
- Put back into oven for another 30 seconds to 1 minute to finish baking.
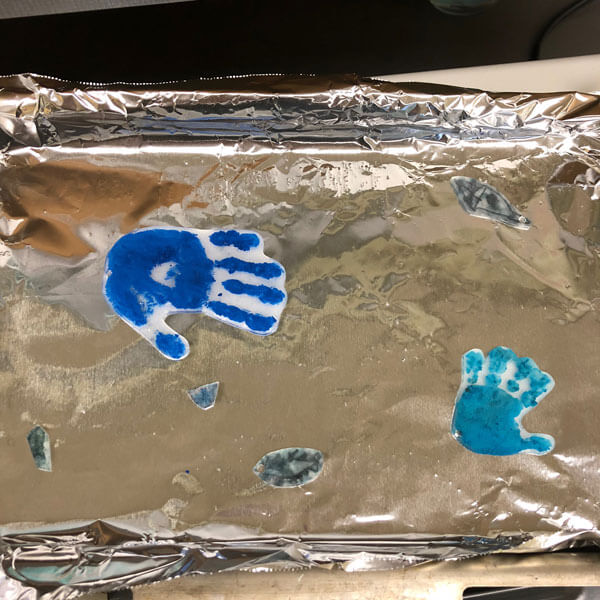
- Remove from oven and let cool.
- Brush off any excess tempera paint flakes from handprints and apply 1-2 coats of Mod Podge to painted side only to seal.
- Assemble the keychain: Attach a jump ring to each handprint. If you are doing multiple handprints, layer each one with the largest on the bottom to the smallest on top.
- Secure to keychain and you’re finished!
Tips
- If your kids are creative (mine are not), let them color their own designs on the Shrinky Dink paper with markers and then cut those out and hole-punch to include with the handprints.
- If your kids are too little for drawing, you can let them scribble on the Shrinky Dink paper with markers and then cut the paper into a shape, such as a heart. I did this with Sawyer and I love the heart addition to the keychain.
- Washable markers are obviously best for kids, but be advised that washable marker color does rub off the Shrinky Dinks before baking if you’re not careful. Handle with care and minimize touching the colored surface until they are baked.
- Only painted Shrinky Dinks need to be sealed with Mod Podge. Any marker ones are finished immediately upon baking.
- I used to be loyal to traditional Mod Podge waterbase sealer that you paint (or dab) on … until I discovered the incredible simplicity of Mod Podge Clear Acrylic Sealer spray. Now I’ll never go back.
- I tried to include Bruno’s pawprint in this project, but after baking, the pawprint just looked like an indistinguishable white blob. Scrapped that idea and didn’t include it in the final product – sorry, Bruno!
- After sealing with Mod Podge, let each piece dry thoroughly before you assemble it on the keychain. If it is still tacky, the handprints may stick together into one clump rather than individual pieces on the keyring.
- I used a regular hole punch, which shrinks pretty small upon baking. I needed to use a 4 mm jump ring on each handprint to attach each piece to the keychain individually. This allows better freedom of movement too.
Apart from the inevitable mess of kids’ handprint crafts, this entire project was completed in under an hour and Easton was amazed at the “magic” shrinking. He loved to be involved from start to finish in a Father’s Day gift and can’t wait to give it to #DoneWithFun Daddy next weekend. I know Tim is going to love it, but what he’ll love even more is the pride Easton has in presenting him with something he made himself.
Share your end results with #NeverDoneWithFun on social media!